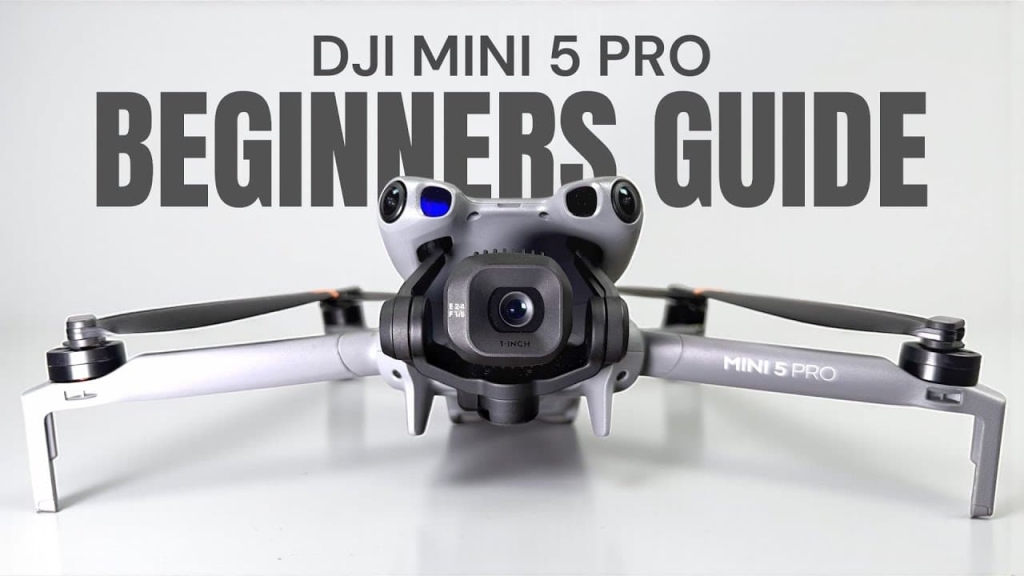
DJI Mini 5 Pro Beginners Guide – Start Here – Get Ready For Your First Flight

Good day folks. Shawn here from Air Photography. This is a beginner’s guide for the brand-new DJI Mini 5 Pro. When new drones like this get released, beginner’s guides help those who are brand new get familiar with the hardware and basic functionality. This guide is designed for those who have never flown a drone before, covering everything needed for a safe, successful first flight. With that said, let’s jump in and get started.

What’s in the box
We’ll go over everything that comes in the Fly More kit. There are several bundles available for the Mini 5 Pro, but no matter which kit was purchased, the basic functionality is identical. The base kit includes the drone, one battery, and a controller. The Fly More kit includes the drone with one battery pre-installed, plus a charging hub with two additional batteries for a total of three. It also includes ND filters, spare props, a charging/data cable, and a quick start guide, though it’s limited. DJI provides a full user manual on its website, which is worth downloading. The Fly More combo also includes the RC 2 controller with a built-in screen and a carrying bag to hold everything.
There are two main controller options for the Mini 5 Pro. The RCN 3 mounts a smartphone; its antenna pulls out and the phone mounts on top, with a tucked-away data cable supporting Lightning and USB-C devices. The more common and recommended controller is the RC 2, which has a built-in screen for convenience, avoiding phone compatibility and app downloads. The Mini 5 Pro is also compatible with the RC Pro 2, launched with the Mavic 4 Pro, available separately, featuring a bright 7-inch screen for those who want a larger, premium controller.
The Mini 5 Pro supports two battery types. The Plus battery prioritizes flight time with a rated 52 minutes, but using Plus batteries puts the aircraft over 249 g. If a sub-250 g drone is needed, choose the regular battery, rated for about 36 minutes, to stay under 250 g.
Controller basics
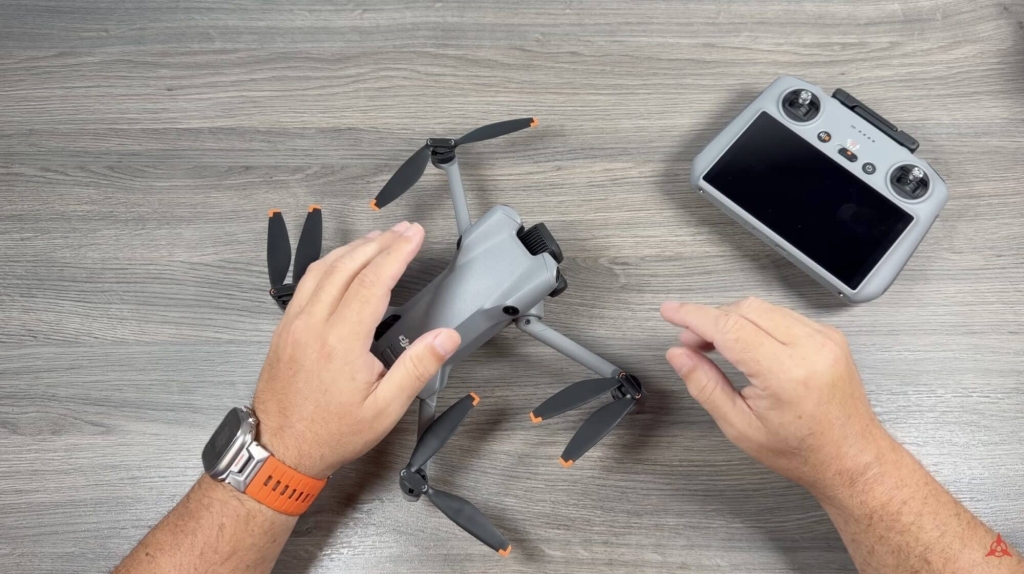
This is the RC 2 with the built-in screen. The control sticks are stored on the back and should be removed and stowed when packing to protect the gimbals. They screw on and are identical, so either stick fits either side. Fold out the top antennas when flying and keep the flat sides facing the aircraft for best signal.

On the front, LEDs indicate connection status and remaining battery. The three center buttons include the power button on the right (single press shows battery level; quick press then long press powers on/off), the mode selector in the middle (Cine, Normal, Sport), and a Return-to-Home/Pause button on the left. Cine mode slows flight inputs and gimbal movement for smoother footage. Sport mode disables obstacle avoidance, so use caution. Press-and-hold the RTH button to initiate Return to Home; single-press pauses current activities such as intelligent flight modes or RTH.
At the bottom is a USB-C port for charging and updates, plus a microSD slot for screen recordings if needed. Most footage is stored on the drone’s card or internal memory. On the back are customizable C1 and C2 buttons. On top, the right record button starts/stops video, the left shutter button takes photos, and two dials adjust gimbal tilt and zoom. The right dial can also roll/rotate the camera for creative effects when combined with a custom button.
Powering the controller and drone uses a standard quick press then long press. The charging hub charges up to three batteries; LEDs indicate charge status, and the hub can function as a power bank via USB-C. Batteries release by pressing the side buttons on the hub.
Drone tour and power options
Always use the gimbal guard when transporting to protect the fragile gimbal. Remove it by pulling down on the tab. The Mini 5 Pro can power on automatically when unfolded and power off when folded; this can be disabled in settings. If the battery shipped in sleep mode, the drone may not power on the first time until the battery is charged (which activates it). The drone can also be powered manually with the quick press then long press on the power button. Inserting a battery will also power it on automatically when swapping in the field.
On the back are a USB-C port for charging/updates and a microSD slot. The battery releases with two side tabs and clicks in firmly when reinserted. The side button currently enables quick transfer to a phone or tablet; DJI may expand its functions later. On the bottom is a landing LED and downward sensors, with additional front and rear sensors. The two center front sensors are LiDAR, with visual obstacle sensors at the sides and rear, providing 360° omnidirectional obstacle avoidance in Cine and Normal modes only.
Storage and charging
The Mini 5 Pro includes 48 GB of internal storage, handy if a card is forgotten, but it can fill quickly. Adding a fast microSD card is recommended. SanDisk Extreme/Extreme Pro cards work well; 128 GB, 256 GB, 512 GB, or even 1 TB are fine. Insert the card graphic-side down until it clicks. In software, recording can be switched between internal storage and the SD card.
Batteries can be charged in the drone using the included USB-C cable or in the charging hub (Fly More kit). A charging brick is not included; most USB-C chargers from phones/tablets work, and DJI sells compatible options. LEDs animate while charging and go solid when full. The RC 2/RCN 3 controllers charge via USB-C; their LEDs indicate charging status.
Activation and firmware
Before the first flight, activate the equipment and install firmware. For RCN 3, download the DJI Fly app from the Apple App Store; Android users typically download from DJI’s website. Connect the phone to the controller, launch DJI Fly, and power on the drone and controller. With the RC 2, DJI Fly is built in; power on both and follow prompts to set language, connect Wi‑Fi, and log in or create a DJI account. Activate the equipment and optionally purchase DJI Care Refresh. Firmware updates usually take 10–15 minutes depending on internet speed.
The Mini 5 Pro’s intelligent batteries also carry firmware. When updating the drone, the installed battery is updated if needed. Inserting another battery later may prompt a battery firmware update without reconnecting to the internet.
DJI Fly app overview
Power on the drone and controller to enter the flight preview. The house icon at top left opens the main app; Go Fly returns to flight view. The top-right three dots open settings. Explore Safety, Control, Camera, Transmission, and About to get familiar, focusing on the basics needed for the first flights.
At the top, satellite count is critical for stability and setting a home point. The obstacle avoidance indicator shows status and can be tapped for details. RC signal bars change with distance, interference, and obstructions. The time remaining counter shows estimated flight time, and battery percentage displays charge; tapping battery opens detailed estimates for RTH threshold, forced landing, and full depletion.
The left status line shows “Takeoff permitted” or errors and provides quick access to safety settings like maximum altitude, distance, and RTH altitude. At the bottom, storage can be toggled between SD and internal. The mode label (Cine/Normal/Sport) reflects the selected flight profile. Intelligent flight modes include Waypoints and FocusTrack/ActiveTrack; those will be covered in separate tutorials.
The takeoff button initiates auto takeoff by pressing and holding the prompt; in flight it becomes Land or Return to Home. The bottom-left tool can cycle between compass, auxiliary view (preview from obstacle cameras), and maps by swiping. The compass shows orientation and tilt; auxiliary view helps visualize nearby obstacles while flying backward, though it’s grainy by design.
Flight telemetry shows height, distance, and vertical/horizontal speed. Units can be changed between metric and imperial in settings. Bottom-right camera info shows resolution/frame rate, remaining storage, and EV for quick exposure comp. Tap to adjust frame rate/resolution; tap EV to brighten or darken the image.
“Auto” indicates fully automatic camera exposure. Switch to Pro mode to adjust white balance, exposure, color mode, ISO, and shutter manually. The right-side mode selector switches Video/Photo/QuickShots/MasterShots/Hyperlapse/Panorama. Sub-modes include Slow Motion or Normal for video, and Single/Bracketed/Burst/Timed for photo. The shutter button captures photos (or starts/stops recording in video). The gallery previews media at low resolution to confirm shots.
AF toggles autofocus/manual focus. Zoom ranges from 1x to 2x in 4K, with up to 3x digital crop if needed; 1–2x maintains better quality. The rotate button switches between landscape and vertical capture. C1/C2 can be customized to rotate the camera quickly.
In Safety settings, obstacle avoidance can be set to Bypass (tries to route around obstacles), Brake (stops at obstacles), or Off. As a beginner, avoid turning it off unless necessary for tight shots. RTH altitude can be left at 100 m or set manually. Set maximum altitude to stay within local regulations (commonly 120 m/400 ft) and consider setting a distance limit for initial flights. The auto power-on when unfolding can be disabled here.
In Control, change units, text size, stick mode (Mode 2 by default), and customize buttons. For example, C1 can recenter the gimbal, and C2 can toggle portrait. Press-and-hold C1 while turning the right dial to roll the camera for creative shots.
First flight demo with the DJI Mini 5 Pro
A landing pad is recommended for clean, safe takeoffs from grass, wet ground, or snow. For the first flights, choose a large open area with few obstacles and people. Research local drone regulations before flying to avoid fines.
Launch methods:
- Auto takeoff: Tap the takeoff button, press-and-hold to launch; the drone will hover about a meter high.
- Stick takeoff: Pull both sticks down and inward (or downward and together) to start motors, then gently push up on the left stick to lift off.
To land:
- Use the on-screen Land button when close to home, or
- Pull down the left stick when hovering near the ground for auto-landing.
Obstacle avoidance shows yellow/red proximity arcs at the screen edges and audible beeps when near objects. Switching to Sport mode disables obstacle avoidance; the icon turns red. In Normal/Cine modes, it’s active (white icon), and proximity visuals remain present on the compass overlay.
Basic stick controls (Mode 2):
- Right stick: forward/backward for movement; left/right for lateral motion.
- Left stick: up/down for altitude; left/right to yaw (rotate orientation).
Combining both sticks enables smooth, dynamic moves with practice.
Ensure sufficient satellites before takeoff—ideally 15+—and wait for the “home point updated” prompt. Verify the home point via the map’s yellow H or on the compass. Good satellite lock improves hover stability, especially in wind.
Return to Home
RTH types:
- Manual RTH: Press-and-hold the controller’s RTH button or choose RTH from the on-screen Land/RTH prompt to have the drone return and land near the takeoff point.
- Failsafe RTH: If disconnected due to range or interference (or controller battery loss), the drone automatically returns. It typically reconnects when back in range.
- Low-battery RTH: The drone calculates remaining battery versus distance and may initiate RTH automatically when needed.
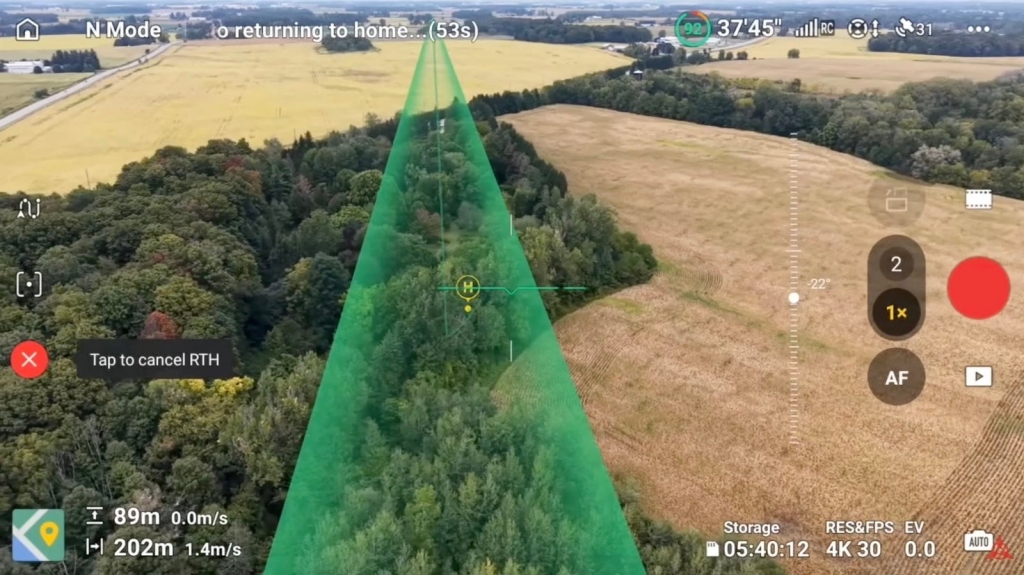
During RTH, a green path line shows the route. Always monitor RTH; press the red X or the Pause button to cancel if necessary. The Mini 5 Pro builds a real-time map on the outbound flight to help navigate back through complex environments.

Props and maintenance
If a prop is damaged by a nick or branch, replace it. The kit includes A and B props. Props are color-coded: some have gray printing, others orange, with diagonally opposite props matching. Motors have an orange ring to help match the correct prop. To remove a gray “B” prop, press down and twist clockwise to release. To install, align the clips, press down, and twist counterclockwise to lock. Check each prop is firmly secured.
A content transfer video is coming soon, covering transfers to a phone, tablet, or computer via direct USB, card removal, or the DJI Fly app. If this Mini 5 Pro is the first drone, consider subscribing to the Air Photography YouTube channel for upcoming tutorials and demos. Also, visit the Air Photography author page for more articles and resources.
